A Brief Git Tutorial
This page will be completely useless to those who know how to use a repository. Students need to understand how repositories work, since almost no job will let you work completely alone. The repository we're going to use is git, since it is a de facto standard for distributed repositories. There are lots of good tutorials for understanding git, but none are that simple. Here I want to let you see how you will work with others, as simply as possible. In this tutorial we will not use the command line, we will use a graphical interface: Atlassian's SourceTree, which is one of the best I've seen around. It is available for both macOS and Windows.
The main tenets of distributed repositories are simple:
Thou shall work on your own computer, and your computer only
Thou shall commit often, thou shall commit early
So, every action you will take is bounded to your own PC. No exchange is done with your collaborators. We will learn how to work with other people from the simplest point of view: we are the masters of our repository, and we will get in touch with others just when we want.
Committing, i.e., storing changes to your repository along with a useful message that describes what you've done, is not only encouraged, but let me say this: it is mandatory.
A list of rules is at the bottom of the page.
Creation
Usually you will create a repository in a remote location, for instance Microsof GitHub or Atlassian BitBucket. Why? For two factors:
- Collaboration
- Disaster recovery
The last one is easy to understand: if you work on your computer, and only there, what happens if your hard drive dies? So, having a third-party handling a copy of your repository is good.
The first one is the bridge between you and others. If you work on your computer, how will others access your changes? We have two options: opening ports on your computer and creating accounts, or using a third-party hosting. It isn't good to open your computer to others, moreover, what would happen if you close your laptop? Others won't be able to access your changes.
We're left with one option: going external.
For example, we are going to create a repo called metallica.
Cloning
We have created a repository and added users following the instructions, and we're good to go.
So let's clone the repository.
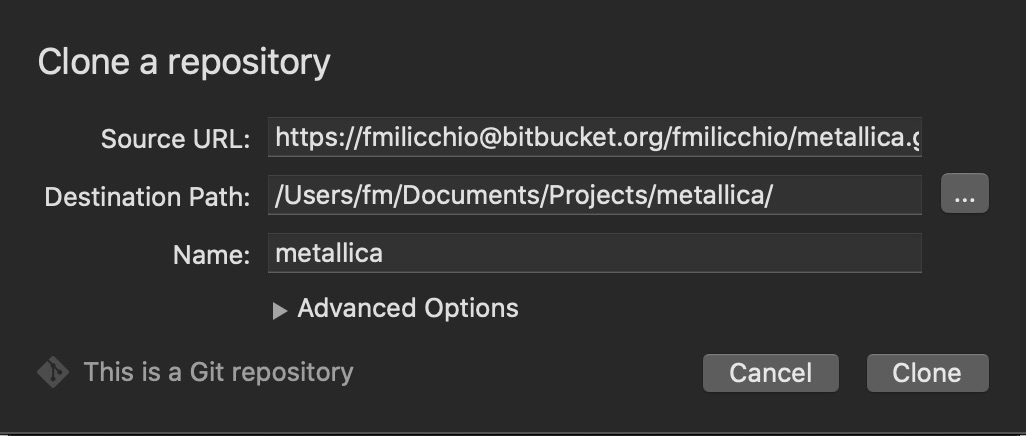
What have you technically done? You have copied all the changes since the creation of the repository. Let me be clear: all the changes since the beginning. After all, it's called "cloning".
So you have a complete clone on your computer. The remote location will be retained (remember you've cloned it), and it is properly called "origin" (in the window under "Remotes"). Your local repository is called "working copy", since it is the location where you will work.
Commit
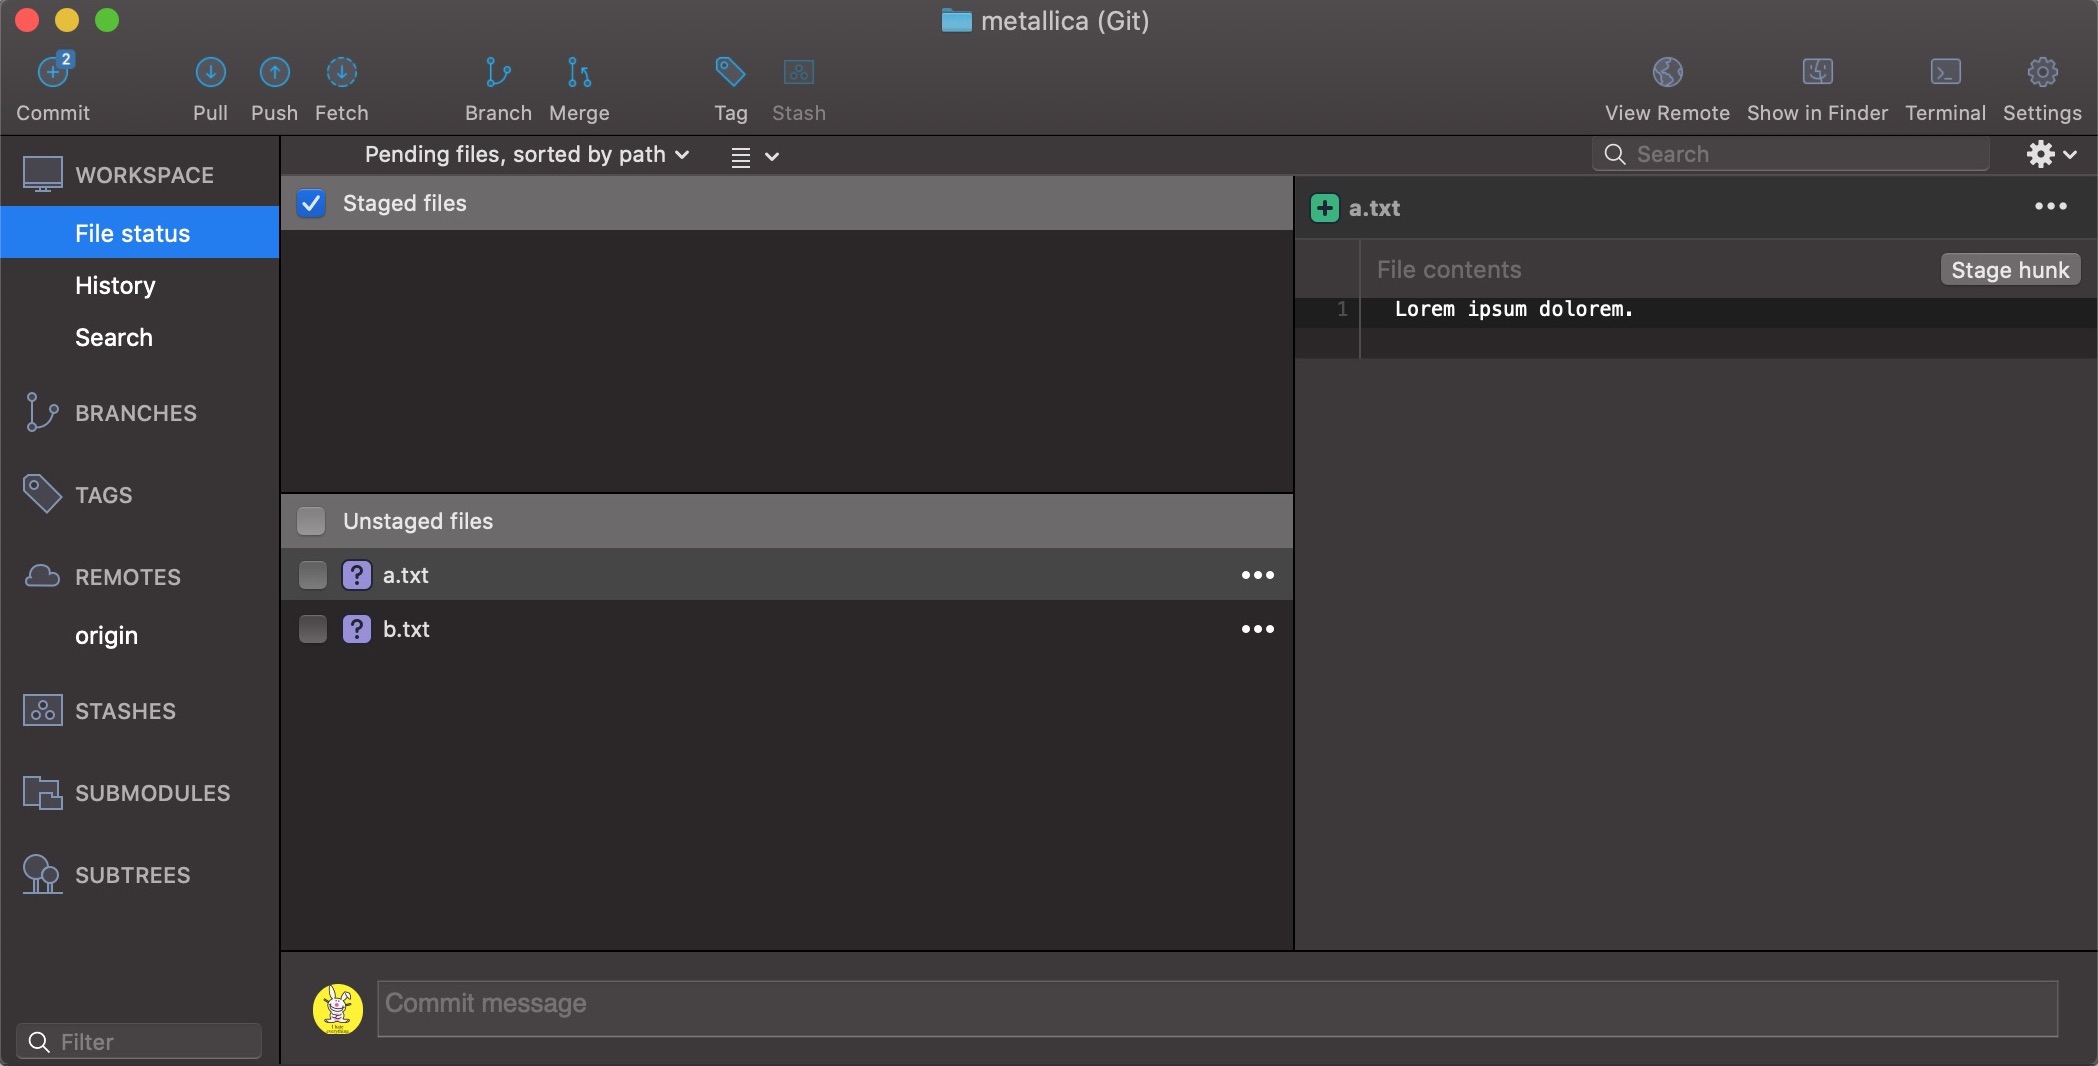
Now we have our local repository, and we're ready to work. Let's add two text files, just for exemplification, called a.txt and b.txt. After adding them, you will see that, if you open the repository in SourceTree, there is something in your working copy.
This repository management software, git, work simply with changes. Anything may change: you may add a file (a change), you may delete one file (a change), or you can change a file.
So, once you take a look at all your changes, you need to add your changes to the list of changes that you deem good to go (you may see the "Add" button). This is called "staging". Once you stage them, they will move in the upper side of the window, as in the picture.
Then we will commit, and you must supply a message for your commit.
A commit is a point in your timeline where changes are stable.
Master
But what happened really? Taking a look at the repository window, we will see that on the right, under "Branches", we have an item called "master". This is a branch.
A repository is like a tree. It starts from the root creating the repository, and therefore creating the main branch, that is called "master". Our local repository has a branch, and since it is a clone, it will be called as the origin: master.
Note that this cloning effectively creates a new local branch, and since we just cloned, we have no connection whatsoever with the origin. We can inspect our commit in the window, noting all changes that we've made.

Again, there is no connection with the origin, in fact, if we open the origin in the "Remotes" item, we won't see anything. In fact, nothing happened remotely: we've just created a repository there, and no changes were applied.
Remember: everything we do, is just local. So how could we possibly share work with others?
Remember that you can choose the name of your "main" branch, and here we chose "master" for obvious metal music reasons.
Pushing
We are now ready to connect our local repository to the origin, or in git's terms, we are going to track the origin's master branch with our local master branch. We will do this by pushing our changes to the origin.
A push is the action of sending all your commits to the remote location. This ensures that all our work won't die with our hard drive; in the following it will allow us to work with other people, too. So let's hit the "Push" button. We are prompted with only one choice: selecting what branch we'd like to push, and if we want to track it.
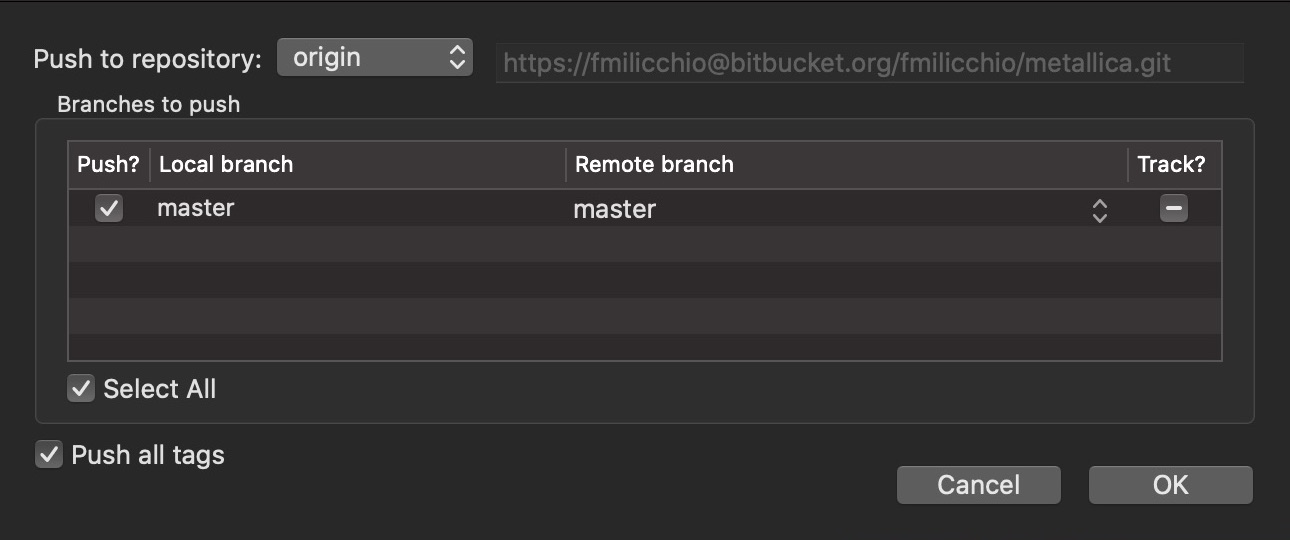
Of course we'd like to push our local master branch to the origin's master branch, and we'd like to track it. It means that all changes that will happen remotely, will be seen and we will be alerted of this. This fact will be handy when working with other people, as we will see.
So now all changes will be tracked (to and from the origin), and every commit that happened will appear in the origin (you can check this out by going to the web interface). Also, in your window under "Branches", i.e., your local repository, the last commit will have not only the "master" tag, but also the "origin/master" one.
As a side note, all commits have a unique identification, which is actually a SHA hash. Conveniently, SourceTree can commit and push at the same time.
Branching
So now we're ready to work with other people. But how can we ensure that our changes won't conflict? Before continuing we need to create a new branch so that we won't work on the master. A rule of thumb is the following:
You shall never use the master, you shall always commit to a separate branch.
In some work environments, master is reserved for the team leader, since he's the one that incorporates all changes from everybody, and deploys if possible. But you can work on the master branch, of course: just make sure only one person uses it.
When you hit the "Branch" button you will be prompted with a choice: the name of the new branch, and if we want to checkout the new branch, which means in the git jargon, to switch your local copy to the new branch.
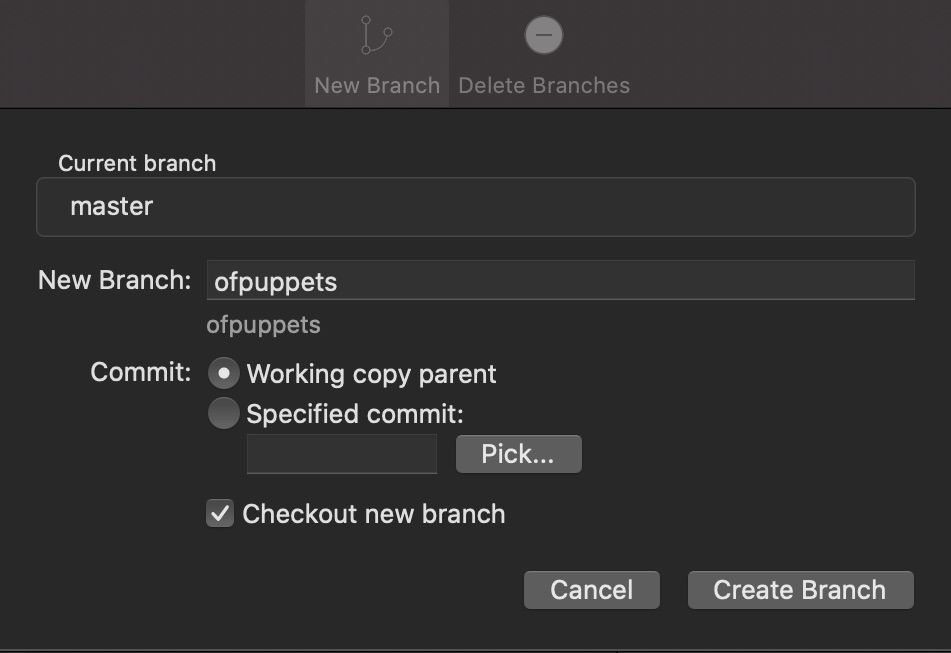
The main window for our repository will then make this branch appear. A small icon will show which branch we've currently checked out.

We have now created an alternate timeline of changes, so we will work on this branch.
Just for the sake of trying, we will now change a file, commit, and push our changes to the origin, tracking the branch as seen early. Needless to say, on the remote location we will have two branches now: "master" and "ofpuppets", as you can see from the "Remotes" section opening "origin", as well as see the tracked branch in your "Branches" section (in your "ofpuppets" branch, of course).
Note that you could push every branches you have, with SourceTree. However, it is advisable to push only what you intend to: your working branch "ofpuppets".
Now we are ready to go multiuser. Things may seem tricky, but they're very simple, trust me.
Remote branches
Let's now assume the existence of other user, and that we've granted access to our repository, the "origin". This is done by adding the said user via your repository provider, in our case, we will use BitBucket's web interface.
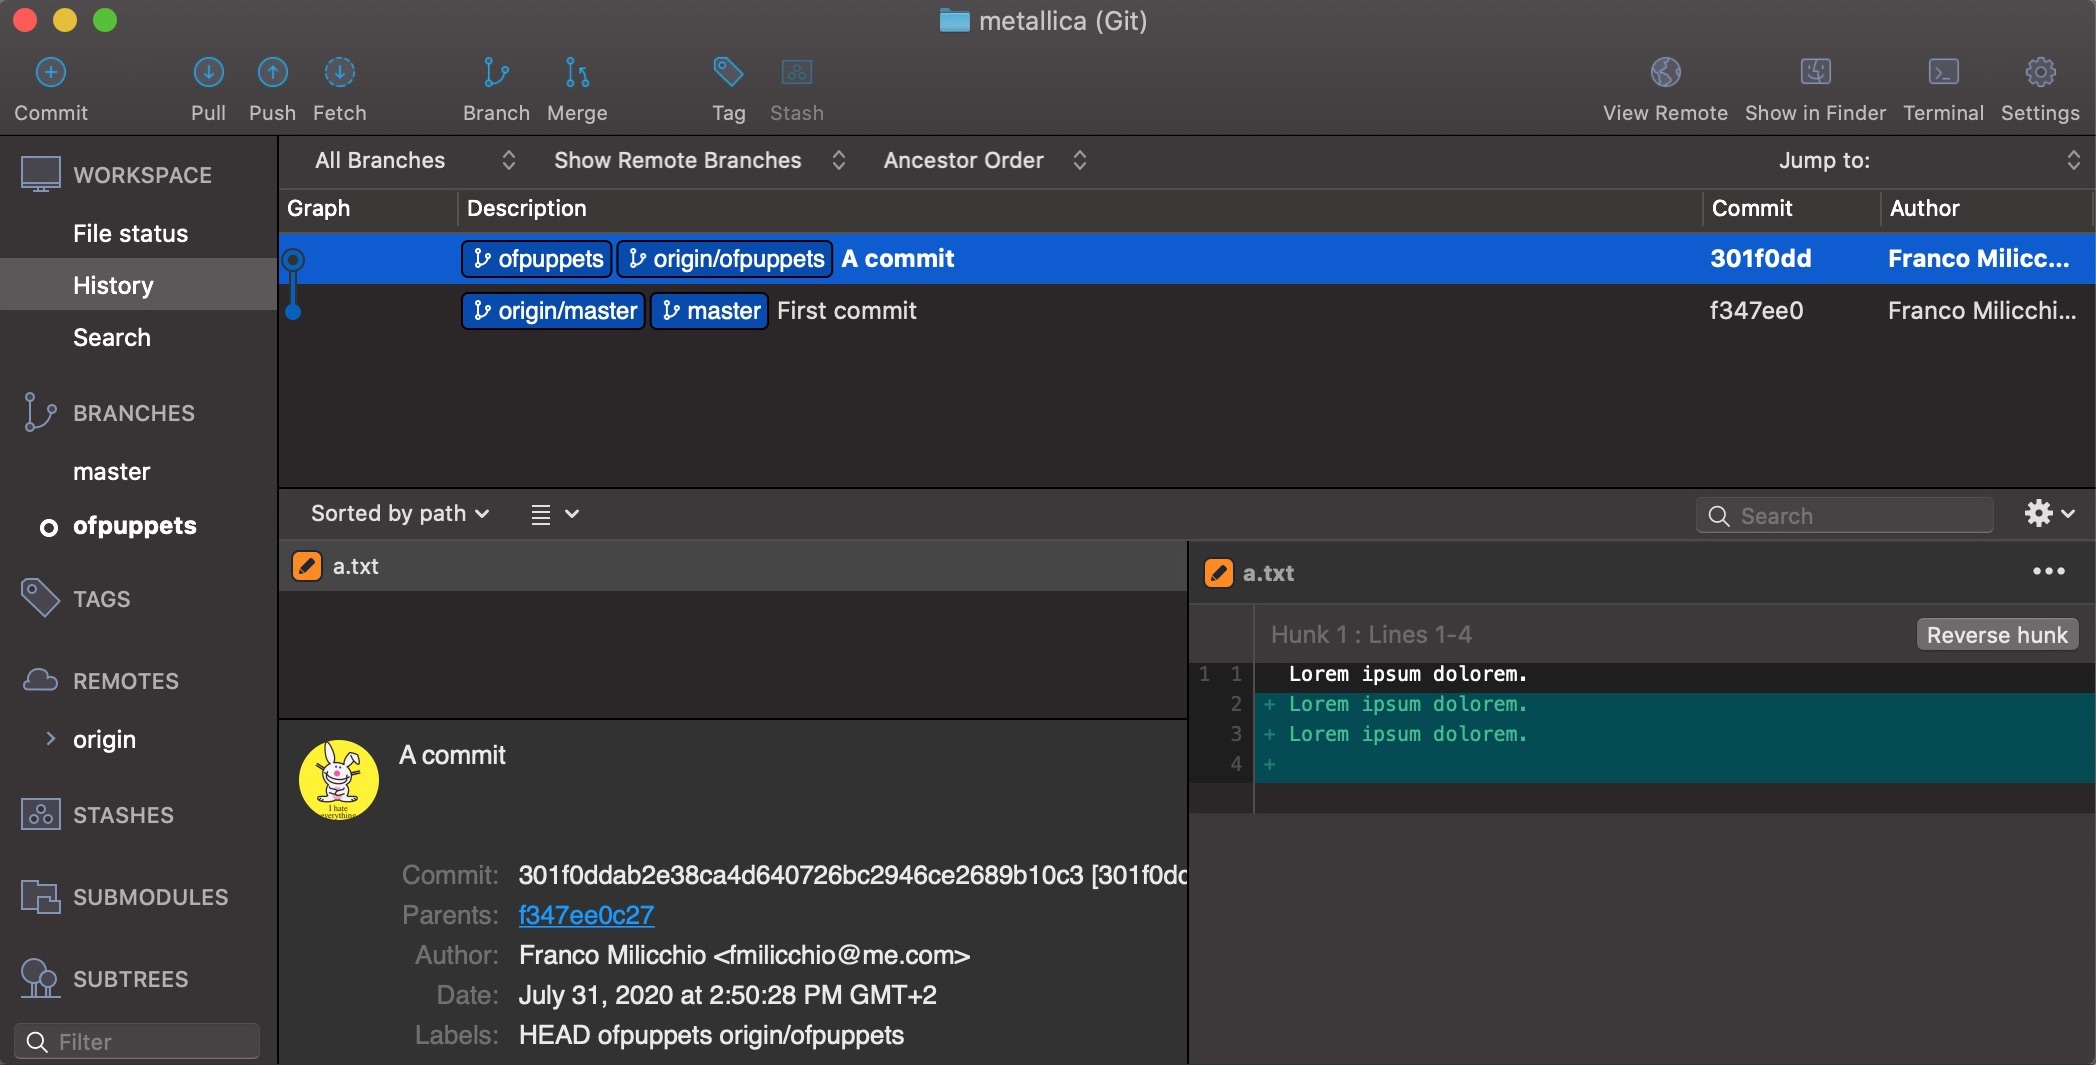
Now our colleague will work on the repository. In order to do so, he will follow the same steps as above: cloning it, branching, and pushing commits. In our example, we will know that our friend created a new branch called "retsam". If we check our repository window under "Remotes", we will see that our origin now has three branches: master, ofpuppets, and retsam.
Pulling
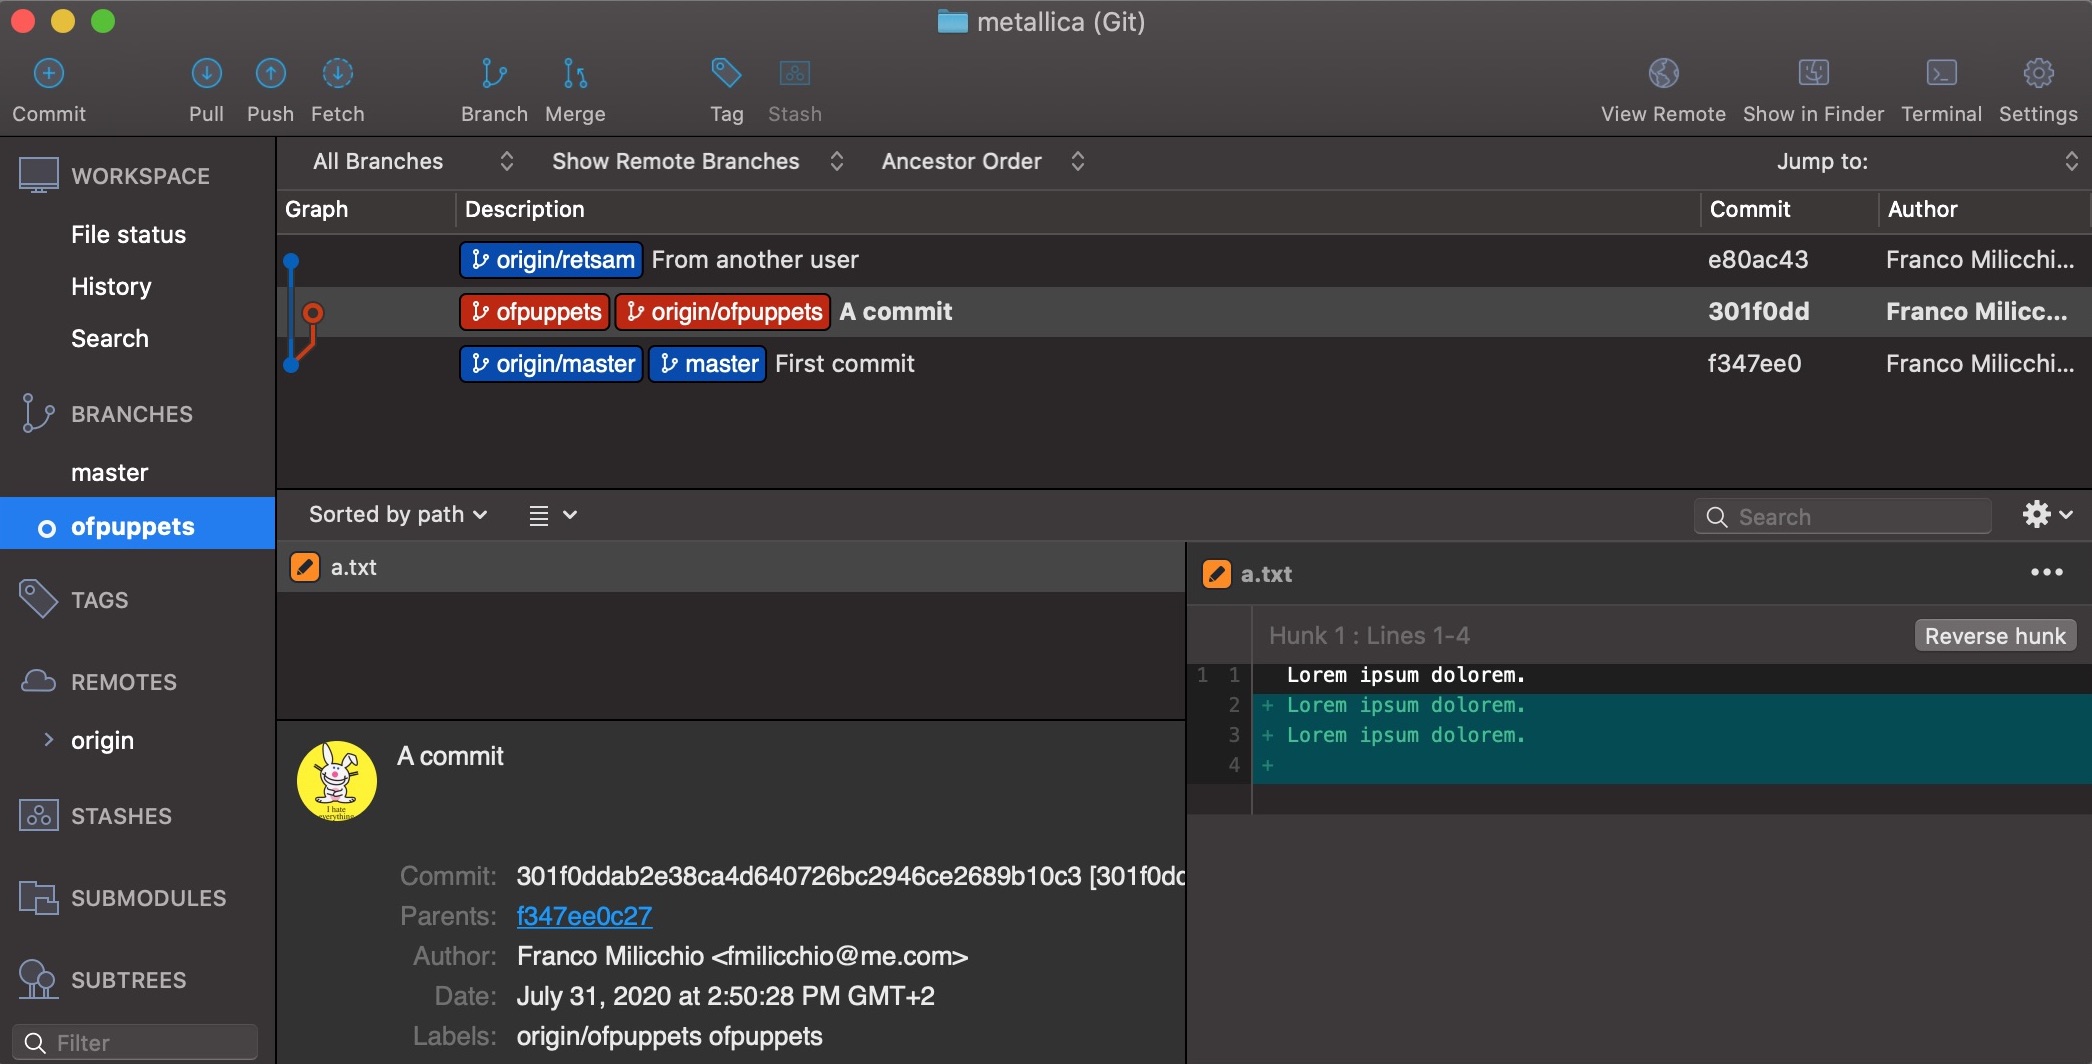
Since we work with our colleague, we want to import our colleague's changes into our working copy. This is done by pulling the changes from a branch into ours.
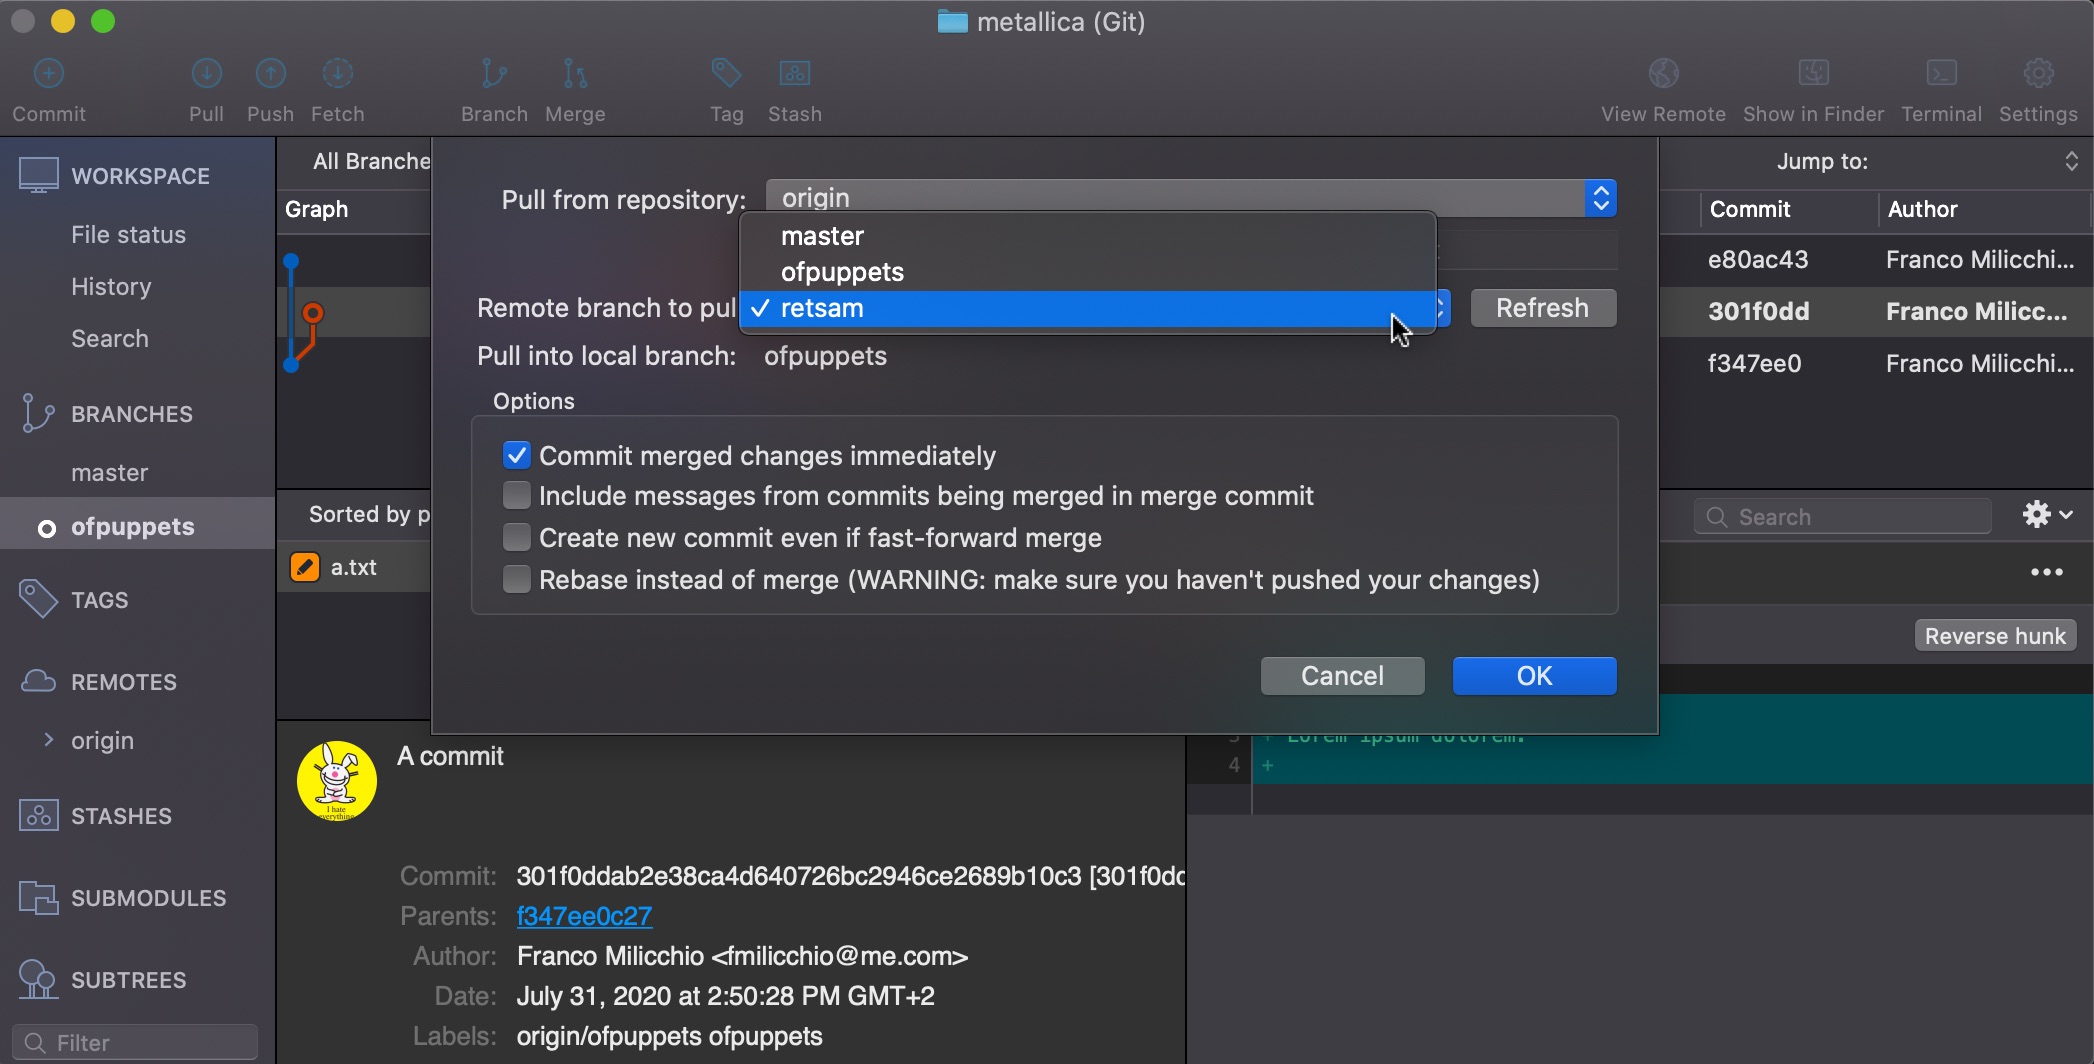
Now we have a complete copy of all the changes made by our colleague, imported into ours. Do this as often as you want, it's a free operation, and you will hopefully avoid what I will explain next.
Conflicts
A wishful thinking is that any merge will be painless. Sometimes people modify files concurrently, and sometimes conflicts between changes happen. When you merge conflicting branches you will be warned, and you will have to resolve them manually.
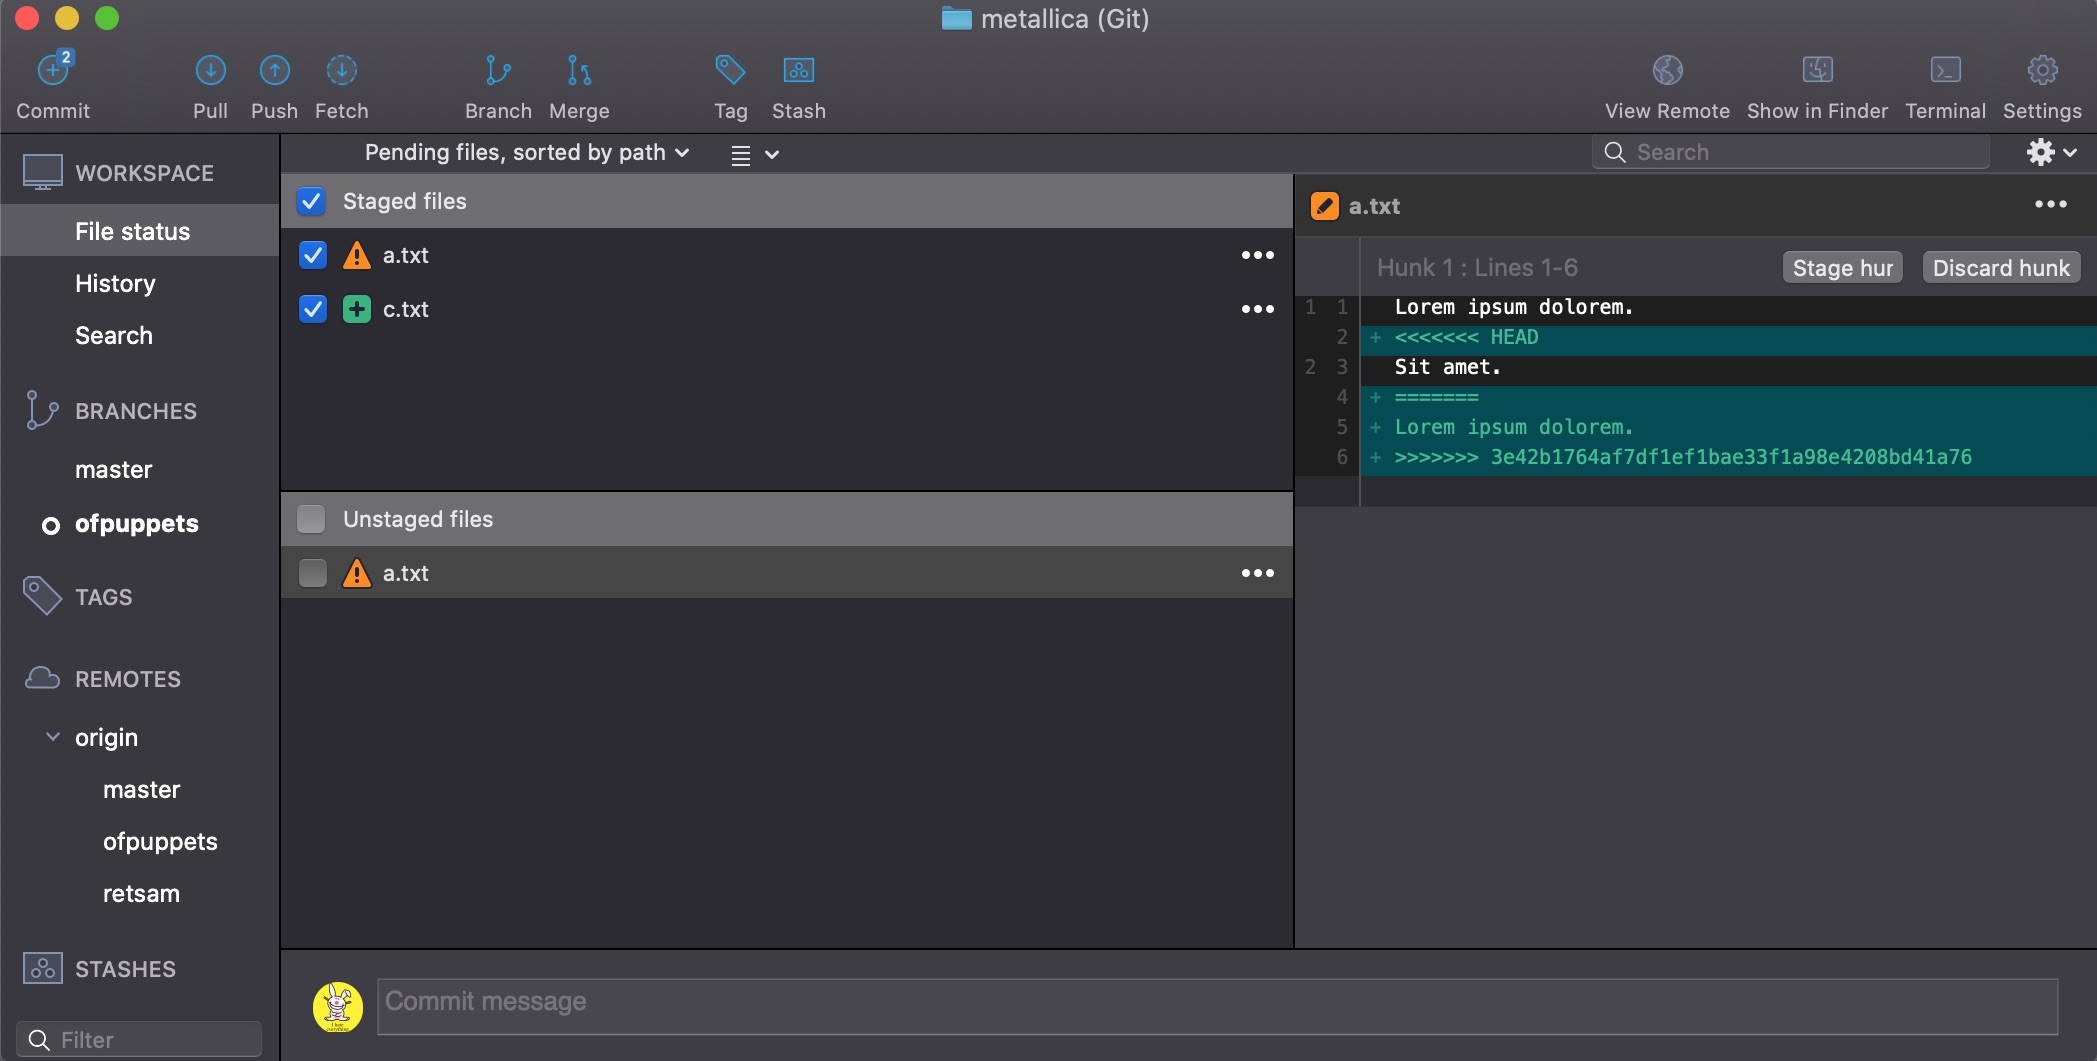
If you right click on the file, you can choose from the "Resolve Conflicts" submenu the item "Launch external tool". This will open the macOS application named FileMerge. Here you can easily see all changes in the two files, clearly named local and remote.
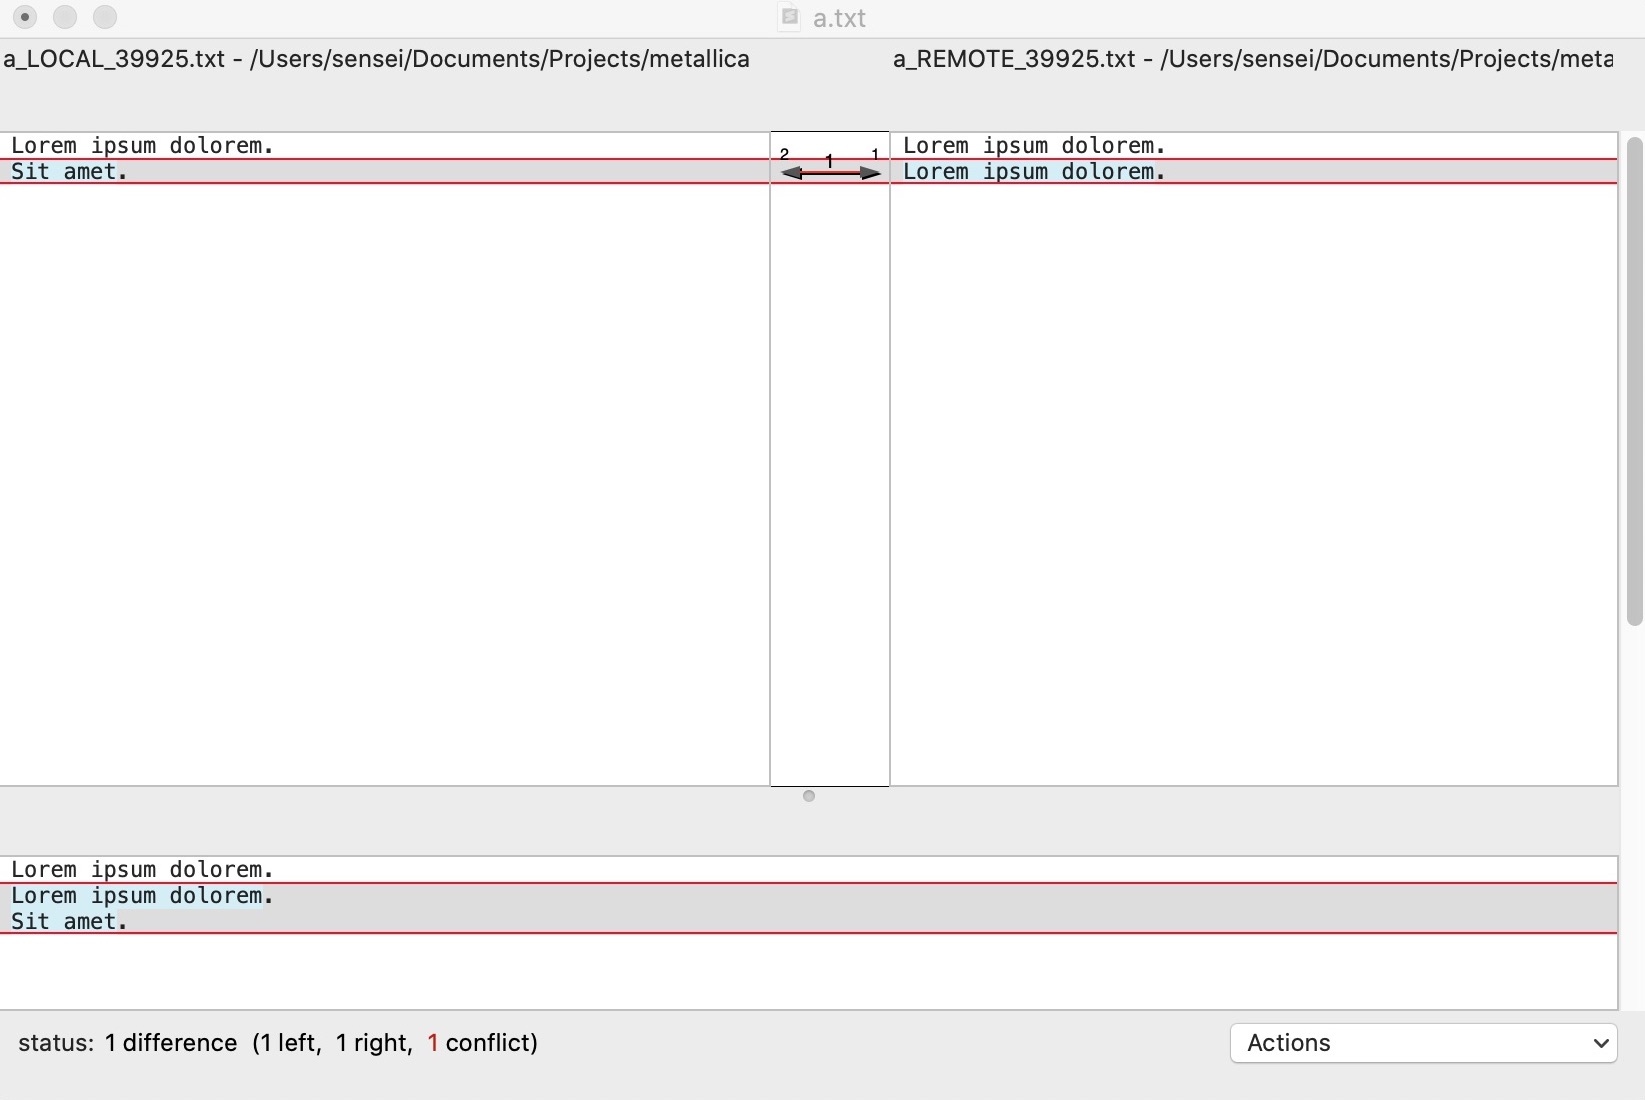
The "Actions" menu will let you choose all available options for each conflict, clearly marked in red. In our case, only the second change is conflicting, while the first is just a line addition; a black arrow indicates a successful merge, a red one a conflict.
Selecting the conflicting change, we can select as an action "Both (left first)", or in other words: both changes are good, but first keep the left version, and next apply the changes in the right. The bottom of the FileMerge window will show you a preview of the changes.
Once you save and quit FileMerge, you can go back to SourceTree and see that, in your working copy, there is already a staged change: our manual change on the conflicting file. There is, however, an intruder: a spurious a.txt.orig file. This file contains the merged conflicted file as it was before resolving all conflicts. You can safely delete it.
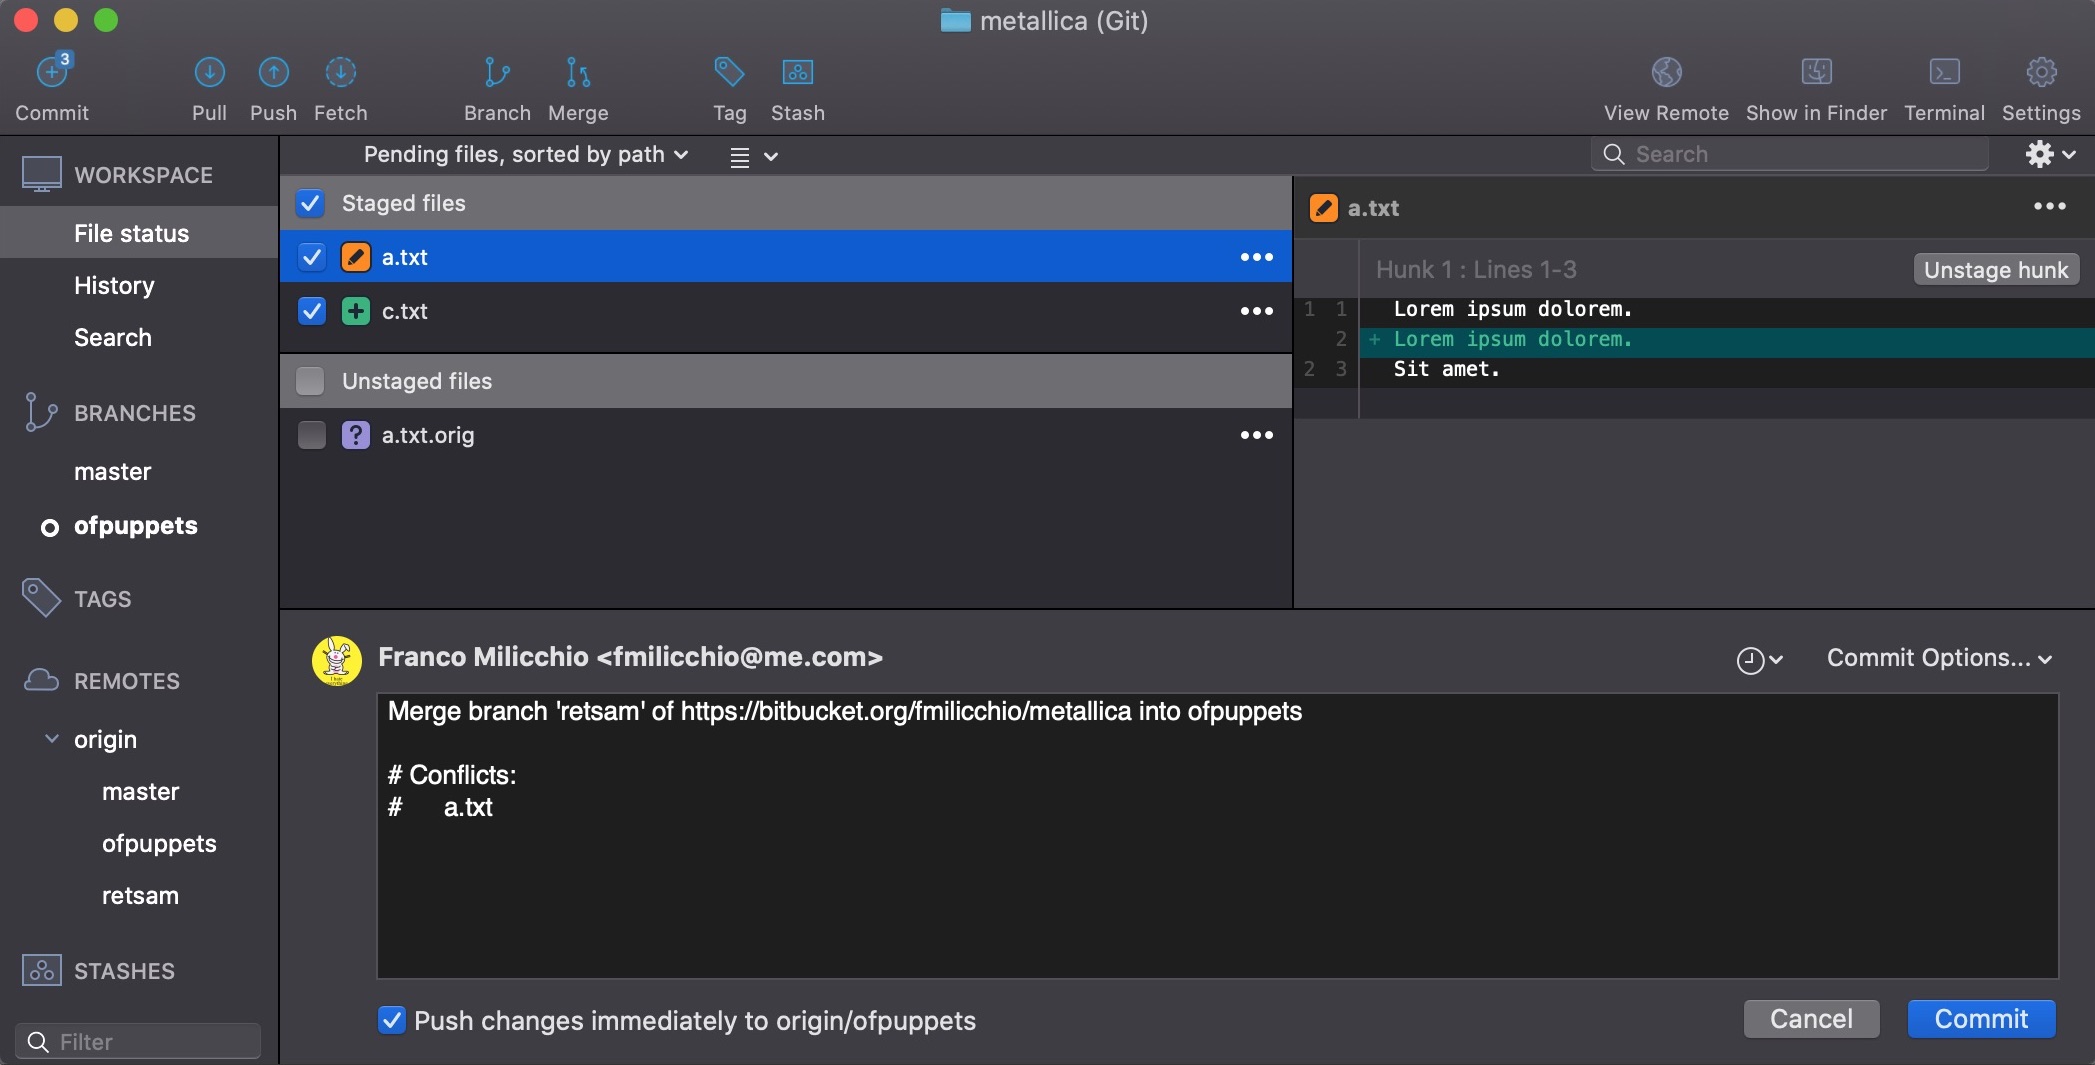
If you commit, you will see that a message is already present. We can now commit, and push our changes to the origin.
Checkout
Ideally, we will not want to work on our colleague's branch, but let's assume we do really want to work on our colleague's branch. Again: do not do this unless you know what this means.
What we want now, then, is to get our colleague's branch on our local system. This operation is called "checking out". So hit the "Checkout" button, and choose "Checkout New Branch".
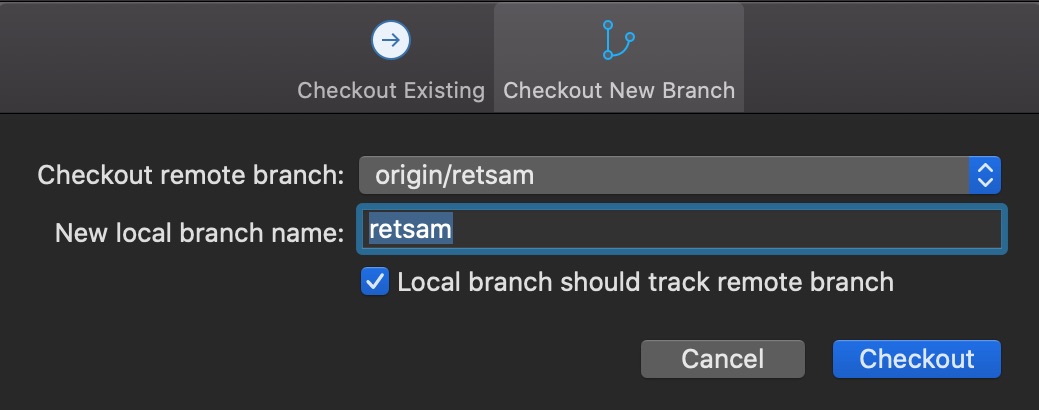
We have the choice of tracking the remote branch, so that any update on it will be notified to us. This is recommended, and it is turned on by default on SourceTree. So now we are on a new local branch called "retsam" that tracks a remote branch with the same name; of course, on your computer the remote branch will be named "origin/retsam", to distinguish it from the local one.
As said earlier we should not work on the same branch with our colleagues, in order to avoid conflicts (what happens when we both change the same file?), so we will promptly switch back to our "ofpuppets" branch, or in the git jargon: we checkout "ofpuppets".
TL;DR Rules
These are some empirical rules to work with git:
- One person, one (or more) branch
- No person will modify another colleague's branches
- Commit and push as soon as possible
- Pull other people's branches as soon as possible
- Avoid adding non-source items (like compiled binaries)
Final Remarks
This isn't a real tutorial on git. I have simplified a lot, and for example, some operations may not be needed. The purpose of this is to provide you with a simple and visual representation of what happens when you use git, with the simplest and most used operations.
For instance, we may not choose to fetch and pull changes of our friend's branch: we may simply pull the remote branch into our working copy. This is a shortcut to what we've done before: as stated above, a pull is simply a fetch and a merge. It is quite useful to know before pulling right away what a pull operation does, and I hope now you've got a grasp of it. I haven't explained what the HEAD is, and with this countless other details that many won't even bother to understand: it just works. I also left the "distributed" part: git may have many remote repositories, but this is material for other documents that you may already read online.
There are several awesome tutorials online, far more comprehensive than this one, so please go visit git's homepage and read the documentation.